Say you’re filming an interview and choosing between a rust jacket and a charcoal one. Both look good in the product photos, but one is shot in bright studio light and the other is styled with a completely different outfit. You want to see what changes when you swap the jacket and keep everything else the same.
VirtualTryOn.art’s clothes changer lets you use the same person photo for both versions. Give it a garment reference and a short prompt, then compare the two looks before pulling clothes for a fitting or ordering anything.
VirtualTryOn.art and this blog share the same owner.
Open the VirtualTryOn.art clothes changer.
Make the comparison about one decision
Start with a well-lit photo in the pants and shoes you’ll wear on set. Frame it wide enough to show where the jacket ends, and keep your arms away from your torso. For each jacket, use a clear product photo that shows the front, collar, and sleeves.
In Single image mode, add the person photo and jacket reference. In the prompt, identify the person photo with its image tag. The example below uses @image1. Check the Public setting before generating, and get permission before uploading someone else’s photo. Generate one version per jacket using the same person photo, crop, and wording each time. If you swap the pants and move to a different background in the second version, it gets harder to tell whether the jacket made the difference.
Try a prompt like this for both versions, using the corresponding jacket image each time.
Dress the person in @image1 in the jacket from the clothing reference. Keep the pants, shoes, pose, framing, and lighting as close to @image1 as possible.
Compare the outfit at the size people will see it
Put the two images next to each other. For an interview, crop copies to the head-and-shoulders framing you plan to use. At that size, the jacket’s color near the face and the neckline may matter more than how it pairs with the shoes. For a full-length styling board, look at where the jacket ends and how its shape balances the pants.
Zoom in before sharing a concept image. A generated version can redraw a button, soften a pattern, or change a hem. If the tool alters something central to the comparison, try a clearer garment image or a prompt that specifies the detail you want to retain. Use the retailer’s photos to confirm construction and its size chart to choose a size. The preview can help you judge the look, while physical fit depends on measurements, cut, and fabric.
A real example from the clothes changer
VirtualTryOn.art’s gallery starts with this seated portrait. The example combines it with references for a blouse, skirt, and hat, and also asks for a cat and a Victorian backdrop.
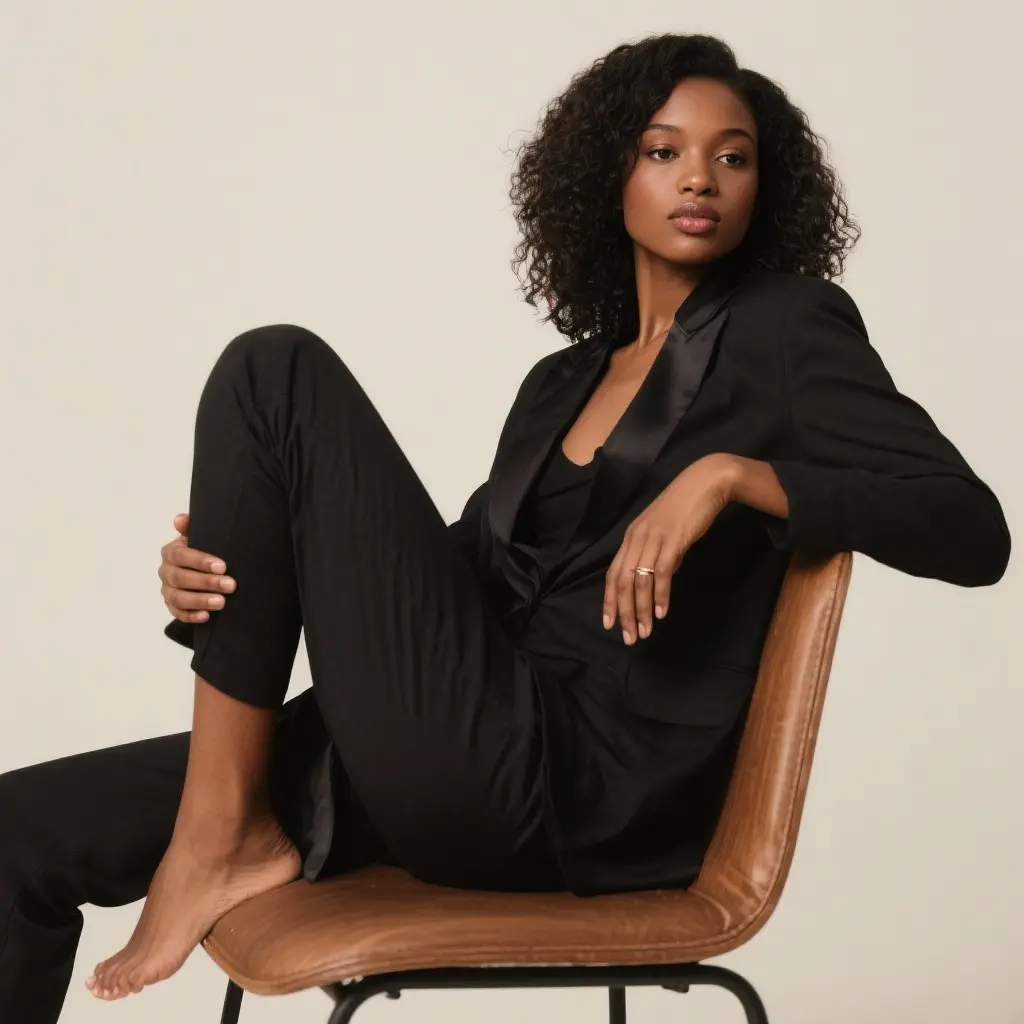
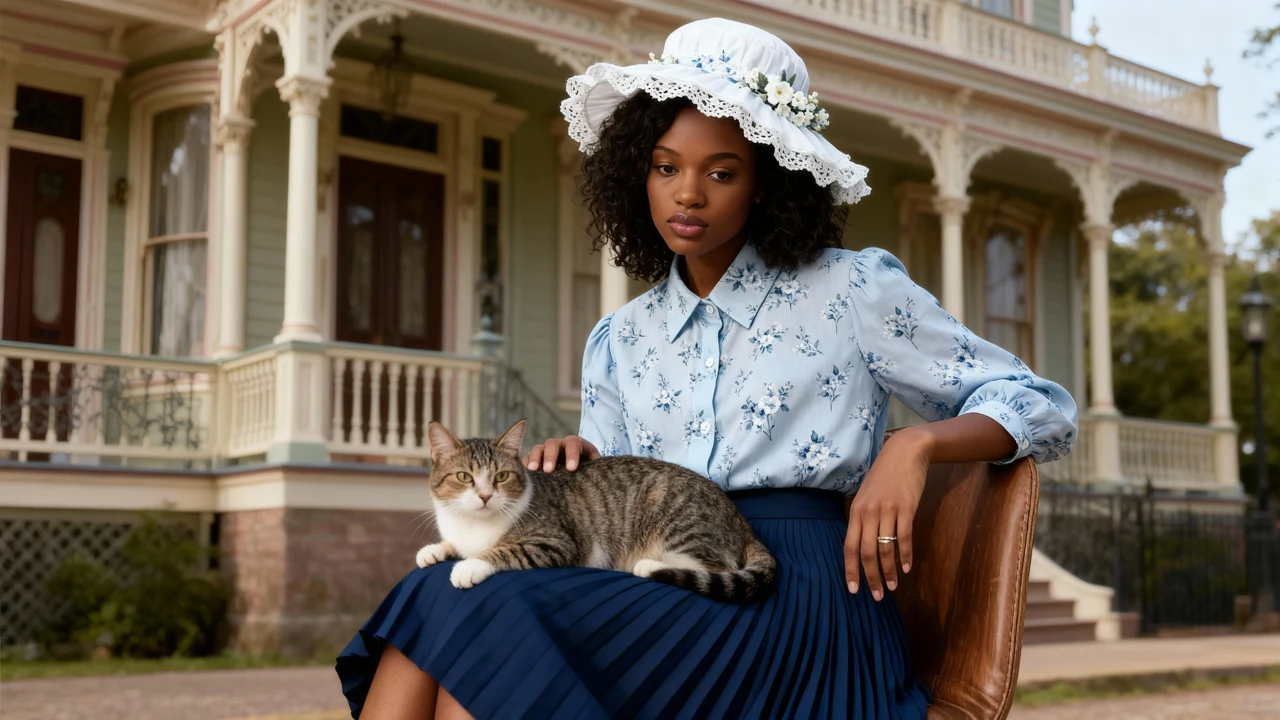
The result works as a mood-board image. The new setting, pose, and crop also change what you notice about the outfit. When you’re deciding between the rust and charcoal jackets for an interview, keep those other choices fixed so you can see what the jacket changes.
Take the shortlist to your fitting or shoot
Keep the stronger image alongside the original product photo so the crew can see the styling idea and the actual item. At the fitting, check the jacket under your set lighting, then clip on the lavalier where it’ll sit during the interview. Have the speaker turn in their chair and reach for a glass of water while you listen. A jacket can look great in the frame and still rustle against the mic every time the speaker moves.